Create Viral Videos with SORA in .NET MAUI
Hello devs! I'm so excited to be part of the .NET MAUI ...

.NET is also an open-source platform, with a growing community of developers contributing to its development.


In this post, I will show you in more detail how I created the story generator application for children, as well as additional resources and source code. Let's get started!

In the .NET CONF video, I showed that the application was created in 5 different steps. The first step was to create the parallax effect. I found this idea very interesting to be applied in an application for children. Searching if someone had done something similar in Xamarin / .NET MAUI, I was able to find an example from ValonK:
https://github.com/ValonK/Xamarin.Forms.Parallax
In my case, after searching the internet, I ended up using the Accelerometer and creating some additional methods to delimit how much the images can move within their space, as well as to indicate the speed of movement:
					    private double LimitTranslation(double translation, double imageSize, double containerSize)
    {
        double maxTranslation = imageSize - containerSize;
        if (maxTranslation < 0)
            return 0;
        return Math.Max(-maxTranslation, Math.Min(translation, maxTranslation));
    }

    public async Task TranslateImage(Image image, double xTranslationFactor, double yTranslationFactor, uint length, double maxWidth, double maxHeight)
    {
        double xTranslation = LimitTranslation(xTranslationFactor, image.Width, maxWidth);
        double yTranslation = LimitTranslation(yTranslationFactor, image.Height, maxHeight);
        await image.TranslateTo(xTranslation, yTranslation, length);
    }
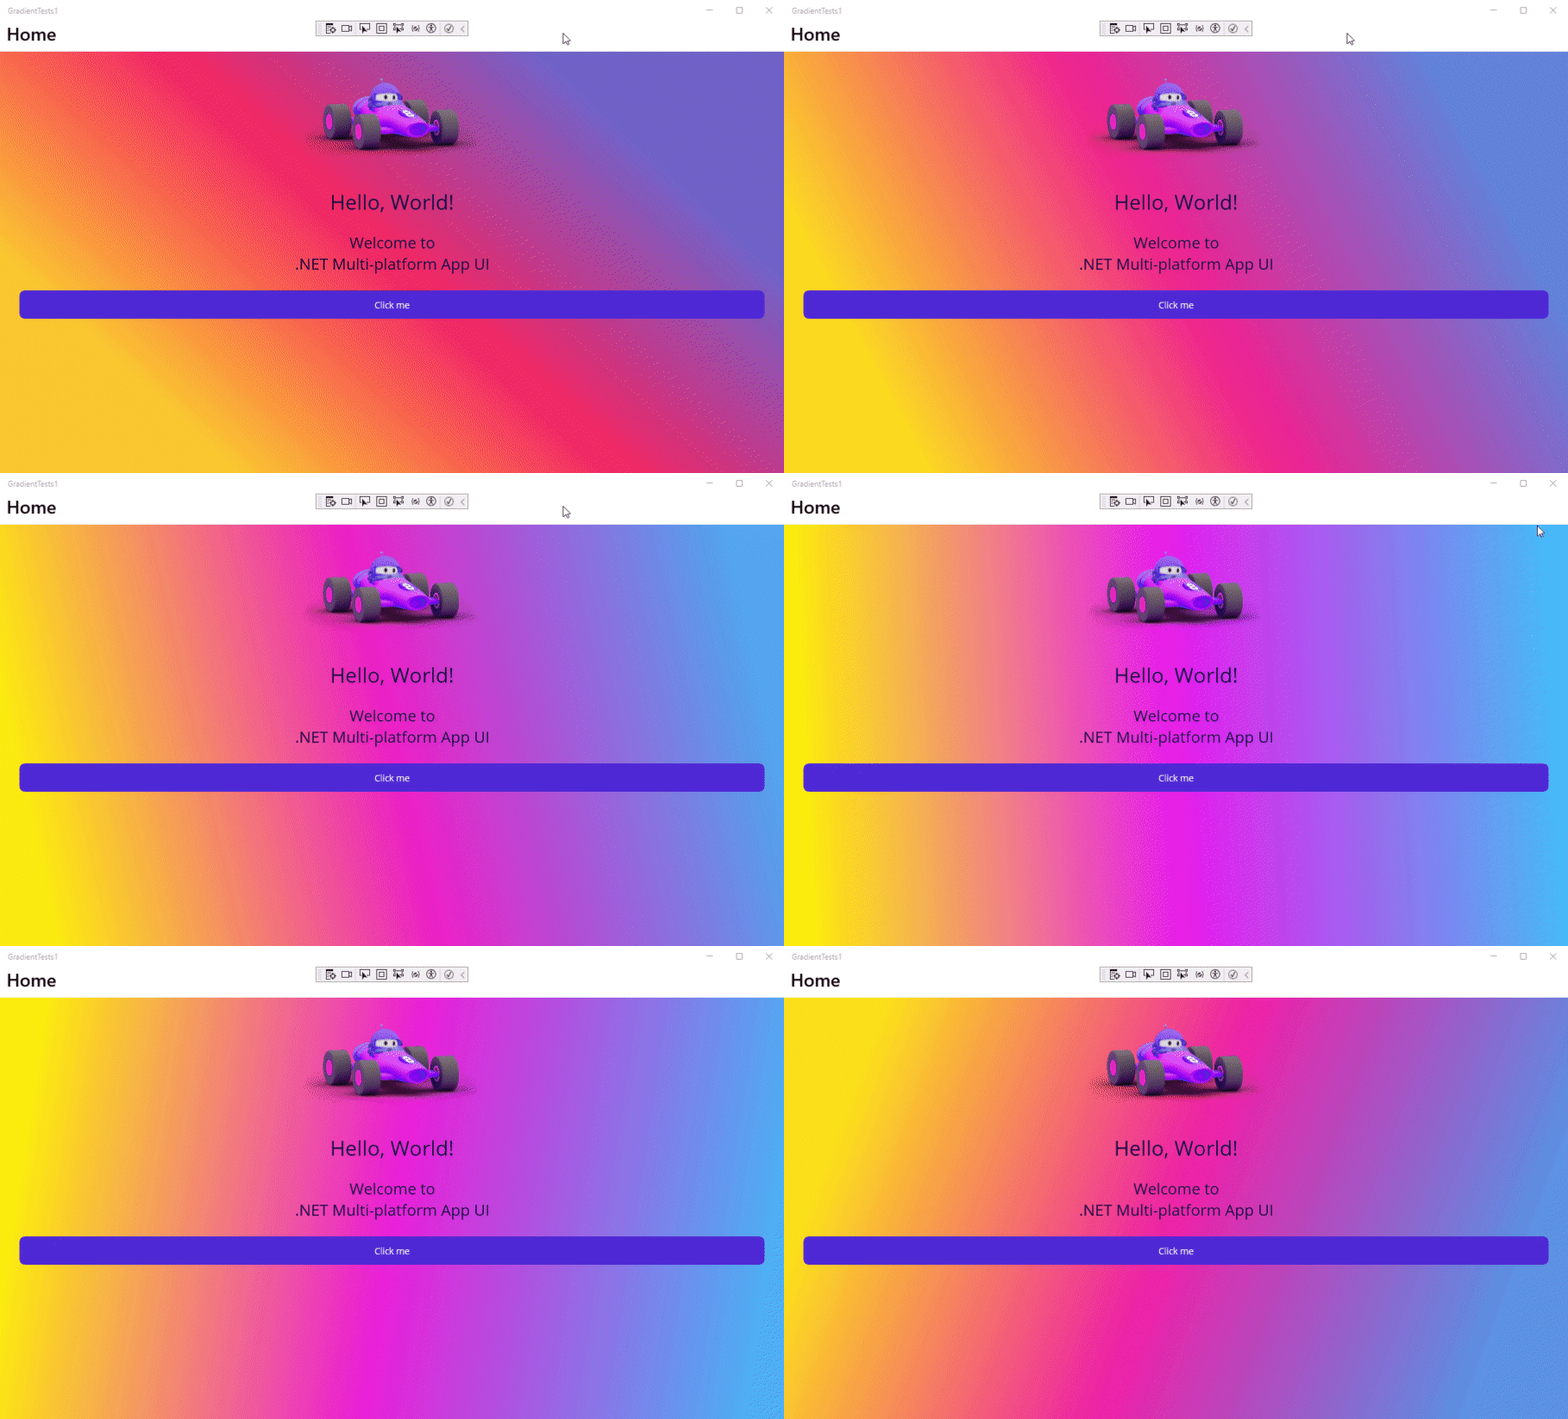
The second step for the creation of the application, was to create a class that allowed to add gradients to a button, but that could have an animated effect. I have to admit that this step was a bit complicated, since I have not found until today, any similar reference for .NET MAUI (using a custom animation).
I started creating some simple animations, until I came to the perfect animation, at least for me, that allows you to add as many gradients as you want and iterate through them in the time you specify. This allows you to control how fast the transitions between gradients happen.
The great advantage of having created an extension class that receives a VisualElement, is that it can be applied to any control that inherits from this type, i.e., it can be layouts, controls, etc. This is an example of an animation as the background of a ContentPage:
The third part, consists of adding an animation that lets the user know that his story is being generated. Since I wanted to have a fully customized page, I decided to use Mopups.
For this step, I have to thank Ahmad Halawani, for creating the beautiful animation you can see below:

If you want a quick reference on how to use the package, Gerald Versluis has a very good video on the subject:

Similarly, I added an animation to the Label control to have an effect where the opacity decreases and increases, to give feedback to the user that their story is being created:
					    void StartAnimation()
    {
        var isFadingIn = false;
        Action<double> callback = input => lblMessage.Opacity = input;

        void UpdateState(double value)
        {
            isFadingIn = !isFadingIn;
            var newOpacity = isFadingIn ? 1.0 : 0.5;
            var length = TimeSpan.FromSeconds(1);  //Duration of the animation

            //Start the animation
            lblMessage.Animate("Fade", callback, lblMessage.Opacity, newOpacity, length: (uint)length.TotalMilliseconds, finished: (v, c) => UpdateState(newOpacity));
        }

        UpdateState(lblMessage.Opacity);
    }
The fourth part was to create the player page of the story, which is composed of an image at the top, a custom control that displays the current page of the story, the text of the story and the player controls.
The image of the current page is an Image control, which has an associated animation that is executed every time the image changes, through the following code:
					public StoryView(StoryViewModel storyViewModel)
{
	InitializeComponent();
	BindingContext = storyViewModel;
    image.PropertyChanged += Image_PropertyChanged;
}

private void Image_PropertyChanged(object sender, System.ComponentModel.PropertyChangedEventArgs e)
{
    if (e.PropertyName == nameof(Image.Source))
    {
        image.Scale = 1;
        ScaleImage();
    }
}

private void ScaleImage()
{
    var startingScale = image.Scale;
    var endScale = startingScale * 2;
    var length = 60000;

    image.Animate(
        name: "ScaleAnimation",
        callback: scale => image.Scale = scale,
        start: startingScale,
        end: endScale,
        length: (uint)length,
        easing: Easing.Linear
    );
}
For the custom control that displays the current page, I used SkiaSharp. Julian Ewers-Peters has an excellent tutorial on this topic.
For the custom control outside the button, which displays the current second of playback, I used a custom control from Javier Suarez.
Finally, to control the audio playback, I used the Plugin.MediaManager package, which fortunately is now compatible with .NET MAUI. I really like this package because it allows to load the stream from a url, and manipulate it to stop it, pause it, etc. In addition, it contains a number of events such as the one that allows to detect when the audio changes to a different second.
The fifth and final step is the creation of the ASP.NET Core Web API to take care of all the information generation, and thus avoid placing API Keys in the application directly. For this step I used Semantic Kernel, which as I explained in the lecture, is a very versatile SDK that allows you to use both OpenAI and Azure OpenAI service, for the generation of text and images. You can find a lot of information on this topic directly in the project repository, and for the case of image generation, here is a concrete example of how to generate images.
For the Text-to-Speech service, I have used the Microsoft.CognitiveServices.Speech package for the generation of the streams, and the Azure.Storage.Blobs package for the file upload.
This project has been a lot of fun and with its complexities, but I was happy to prepare a unique demo for this event. I thank the whole team behind the organization for considering me to give the talk and for organizing such a great event.

Learn how to create cross-platform applications, thanks to the power of .NET MAUI and a series of real projects.
Hello devs! I'm so excited to be part of the .NET MAUI ...
Hi Devs!Nice to have you around.Nice to have you around...

Advent calendars are a fantastic initiative promoted by...